Tuesday, March 28, 2017

The Sweet Suit Saver Science Fair Experiment 2017

If you don't know... Ms. West and I have a science fair reputation to uphold.  We have both won districts a few times individually and since we have been in the same classroom we have placed 2nd and last year we won the district with a perfect score... so when we got to planning this year's project- we were in it to win it... and have so much fun of course!

We always try to connect our project to something we have been learning about in class.  Last year it was so easy because we had been doing baking.  This year we had been reading about the Gingerbread Man so we wanted to tie it all in.  Unfortunately we had done an experiment with the Gingerbread Man a few years ago when we made boats for him- so it couldn't be closely related to that.  We thought about altering his recipe... but we did that with the cakes last year.  So... we asked the kids and they came up with some great ideas.  We wanted to save him from the fox... but he had to get across the water first.  Here were their ideas:
We really loved the idea of either making him hard enough to survive the water or making him a suit.  We decided that we would try for the suit... but it did have to be edible.

Before we started experimenting we learned about solids, liquids and gases.  We also made a batch of gingerbread cookies.  One would be used to see what happened if we left him in the water for 10 minutes without the suit.  The others would be for the coating.  Ms. West followed a recipe with the students to make the cookies.  Once baked we did the first test.


Once we did the initial test it was clear that the gingerbread man got soggy and fell apart when left in the water for 10 minutes.

We introduced the coatings to the students and asked them to make a prediction about which one they thought would help the gingerbread man get across the water (or last for 10 minutes).  The 4 coatings/suits were Chocolate, Marshmallow, Caramel and Karo Syrup (Candy) Coating.  Just by a hair... the most students chose chocolate as the suit they thought would work the best to keep the gingerbread man safe in the water- so that became our class hypothesis.  I was skeptical for sure!
Once students made their predictions we also had them choose a team to work on.  The team would melt their coating and cover the gingerbread man cookie.  The cookie would then be placed in the freezer for a few hours and then be tested.  Students made prediction sheets about the coating they chose.

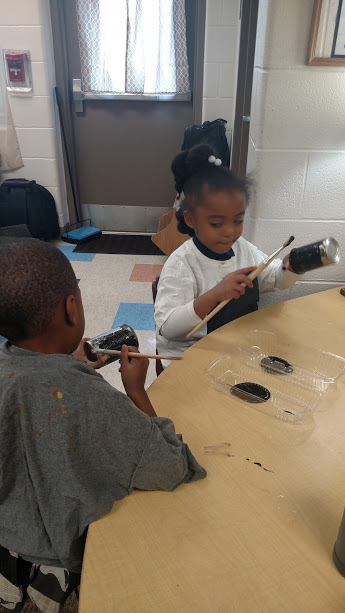
We spent the day coating the cookies in the different toppings. 
Karo Syrup (Candy Coating)/Suit
Marshmallow Coating/Suit
Chocolate Coating/Suit
Caramel Coating/Suit
After the gingerbread cookie coatings/suits had hardened back to a solid form we took them out of the freezer.  Each one was placed in a cup of water for 10 minutes.

After the cookies sat in the water for 10 minutes we took them out to see what would happen.

The marshmallow and caramel coated cookies fell apart right away!

The Karo syrup coated cookie stayed in tact for a few seconds and then crumbled.  It was only hard on the outside but soft soggy in the middle.

The chocolate coated cookie stayed hard and when broken open was still dry in the middle!  We also noticed in the cup that it floated even when we tried to push it down.


The day after our project we used photographs of what we had done to debrief with our students and discuss what had happened.

Our project competed at our school and won.  Then it went to the district science fair and we won 1st place!  I got to go with 2 of my students to a special luncheon for district winners where they got to explain the project.  They did a great job.  

This was such a fun experiment... can't wait to see what next year's project will be.

Underground Railroad Mini Investigation

Every year for Black History Month our school does a door decorating challenge.  Each classroom chooses a famous African American to study and then uses the door to display things they know about them.  This year we really struggled to decide who we should learn about.  Instead of choosing a person we decided to go with the concept of the Underground Railroad.  What started out as a door challenge soon turned into a mini investigation... as it usually does!  We also decided to extend our "door" and really make a door to door display.

We started by reading different books and doing research about the Underground Railroad.  First we learned about slavery.

We learned about what the Underground Railroad was, the people involved and what it might have looked like.
We also learned about the importance of the quilt patterns and how they were used on the Underground Railroad.
We decided our display would be a story map of the Underground Railroad... DISCLAIMER- it is not an accurate map but a retelling of what we learned!  The students signed up for a team they wanted to work on and we got started.


Once all the pieces were created, they were compiled into our story map.  It all turned out really great and the kids learned a lot!


Weather and Seasons Mini Investigation

A few weeks ago, Ms. West and I needed to come up with a plan for our formal spring evaluation (OTES).  We are currently working on a cooking investigation with a focus on restaurants-however-we wanted something the kids could really dig their hands into for a project.  Since spring was coming up and the students had been asking a lot of questions about seasons and the weather- we decided to do a spring weather mini-investigation.  Mini Investigations can be exhausting because it's a lot in a shorter amount of time... but sometimes I think that is what makes them so exciting!

Unfortunately since we were being formally evaluated... we did not get as many photographs throughout the process- but we did get some during our creation phase and of the final products.

The week before we started the weather mini- we reviewed the seasons and really talked about spring.  We wrote about spring during writer's workshop.  We also did an opinion writing about our favorite season and did watercolor paintings of our favorite season as well.  Students also worked collaboratively to make a tree for each season using construction paper, poster board and glue.  I think they turned out really nice!


We also did an EKW chart before we started.

Our weather mini was broken down into 5 parts.
Day 1- Introduction and Vocabulary

  • During this day we reviewed types of weather (we have been tracking the weather every day since the beginning of the school year).  Ms. West also introduced the students to weather vocabulary, weather tools and weather related jobs.  We also started our weather journal to record what we learned and track/predict the weather for the week.
Day 2- Center Experiment Rotations
  • During this day we did a 4 way center rotation (sorry I was too busy to take pictures!).  The purpose of this day was to introduce the students to the 3 types of weather that we would be focusing on for spring weather.  For each type we did a basic introduction with non-fiction text and then did a small experiment or coinciding activity.  Here is a list of the centers we did:
  1. Rainy/Stormy Center- students listened to non-fiction text about rain and storms.  Students did the shaving cream/food coloring experiment in the cup. Students then made rain gauges using recycled plastic water bottles.
     
  2. Sunny Center- Students listened to non-fiction text about the sun.  They learned about sun dials through the Liverpool museum website.  Students then used paper plates, clock faces and pencils to create their own sun dial. 
  3. Cloudy/Windy Center- Students listened to non-fiction text about the wind.  We did an experiment to see if the wind would blow different objects.  Students made predictions and then we used a hair dryer to test it out.   We then learned about the different types of clouds by looking at pictures of each cloud form.
  4. Wind Chimes Center- Our fabulous Wright State student helped the kids decorate a CD using sharpies and gems.  The CDs will be compiled into a few wind chimes to hang outside our classroom door. 
At the end of the day- students chose the expert group they wanted to be in.  

Day 3- Research
  • During day 3 the students worked with the expert group they chose.  We read a lot of non-fiction books and watch video clips.  The students helped us make a list of things they thought were important to tell people about what they had learned about the type of weather they researched.
Day 4- Creation 
  • During this day we made big messes and created our displays.  Earlier in the morning- students wrote the facts they had told us were important the day before.  In the afternoon students used all different materials to create pieces to show what they wanted other people to know.
Sun Expert Group


Rainy/Stormy Expert Group


Cloudy/Windy Expert Group


After all the pieces had dried they were compiled together on boards that the students had painted and placed with the facts they had written.

Sunny Weather Boards
The boards were split up into 3 categories: Sun Facts, Sun Uses and Sunny Gear


Rainy/Storm Boards
The rainy/stormy boards were split up into 3 categories: The Water Cycle, Rain Facts and Storm Facts


Cloudy/Windy Boards
The cloudy/windy boards were split up into 3 categories: Cloud Facts, Types of Clouds and Wind Facts


All of the boards were hung out in the hallway along with our data.  We were able to incorporate a lot of graphing into this study.  The 5th part of our mini will be when students use the boards when we get back from spring break to teach each other about the major types of spring weather.  We also are hoping to have a visit from a meteorologist and we will integrate some weather concepts into our play based centers.